For me, spinning is a meditative process. The creek of the wheel turning, the feel of fiber slipping through my fingers; the rest of the world has a way of disappearing and I'm left with this amazing feeling of creating something special and unique. Spinning fiber into yarn can be a very organic process, and I often have the most fun when I just go for it and let the yarn happen without over-thinking it. One of my favorite ways to spin yarn is to have several types of fiber in a large variety of colors in baskets beside me, and I can then grab handfuls of fiber randomly. It's no secret that I love chunky, funky yarn because it's something that you really can't buy commercially.
Still, there are times when spinning techniques are important to understand. I've always believed that it's OK to break certain creative rules, but you need to know the rules before you should break them. So that's where this blog comes in: I'd like to talk about a few of the more interesting spinning techniques, and why I think they are awesome!
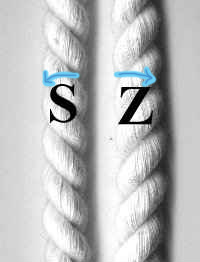 A quick review: The simple S vs Z twist. These terms are common amongst spinners and represent the direction of the twist that you're putting into your yarn. Spinning to the left is known as the "S Twist" and spinning to the right (clockwise) is known as the "Z Twist". The easiest way to tell which is which is to just look at the letters and the direction they are going. The curve of the S points to the left, and the top of the Z is pointing to the right. I prefer to spin my yarn clockwise (Z twist). When I want to ply 2 z-twist yarns together, I do so by spinning to the left in an S twist. Whenever you're plying yarns, the general rule is that you ply in the opposite direction that you spun the yarn in. Cable Yarn Technique
Cabled yarn is absolutely gorgeous, and it's very similar in appearance to a traditional round braid used in bracelet making and macrame. Although it looks intimidating, it's actually a fairly simple technique with endless possibilities. Quick Overview/summary: Cabled yarn is created when you ply two 2-ply yarns together. Additionally, cables can be doubled as many times as you want to create some incredible looking yarns!
- Begin with 2 single spun yarns of the same thickness.
- Ply the two singles together in the opposite direction (so if you spun your singles to the right {z-twist}, ply them together to the left {s-twist}).
- You now have a 2-ply yarn.
- Repeat steps 1 and 2 so that you have two 2-ply yarns to work with.
- Important: In order to cable the yarns so it has the desired look, you need to have twice as much twist in your plied yarn as you'd normally want. In other words, you want it to be over-plied. The easiest way to do it (thank you to Judith MacKenzie for this) so that you have even results is to run your 2-plied yarn back through once more, continuing to ply in the same direction as before. This may seem like it's not an important step, but it is!
- After your two 2-ply yarns have been over-plied, it's time to make your gorgeous cabled yarn. For this step, I set my brake band tension so it feeds into the orifice as quickly as possible. It's recommended that you use the biggest whorl that you have for the same reason.
- Take the two 2-plied yarns and ply them together with each other, spinning to the right (or in the original direction you spun your singles. There should be next to no effort needed for this - because of the over-plying from step #5, the two yarns will snap together easily. The result should be a balanced, beautiful yarn.
One of the most enjoyable parts to any spinning technique is experimenting and seeing what works for you. For me, my go-to spinning style is to spin a fat single with a thin single, creating my typical spiral yarns. Something interesting about these spiral yarns is that, in addition to being great by themselves, they also make an amazing palette for cable spinning. The cable adds more than an interesting pattern to yarn -- it also makes for stronger, more durable end product. Even soft fibers like merino and alpaca can be used for tough projects (such as socks) in this way since cabling adds so much strength. Happy Spinning!
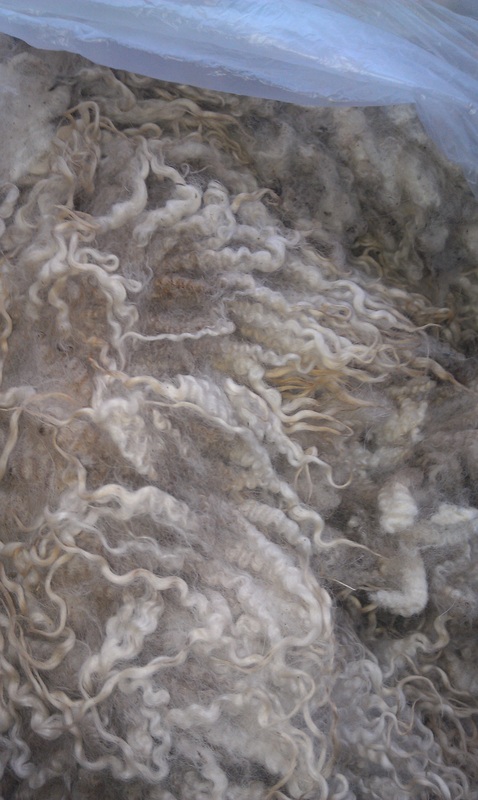
I am absolutely in love with mohair. There is such an amazing texture to it... it's so much smoother than any other fiber, and it's got an almost slippery feel to it. It also has a natural silky luster that makes it almost glow in the sunlight. I've recently gotten my hands on some raw mohair fleeces from a farmer who raises her own goats and sheep and they come from a very loving environment.
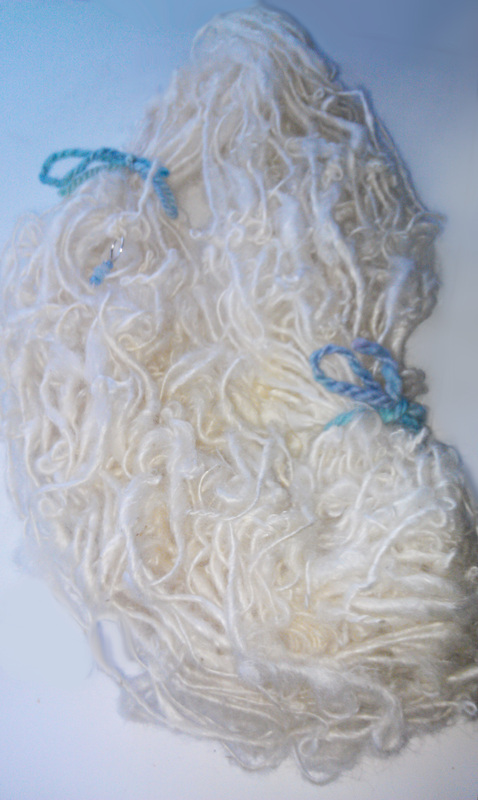
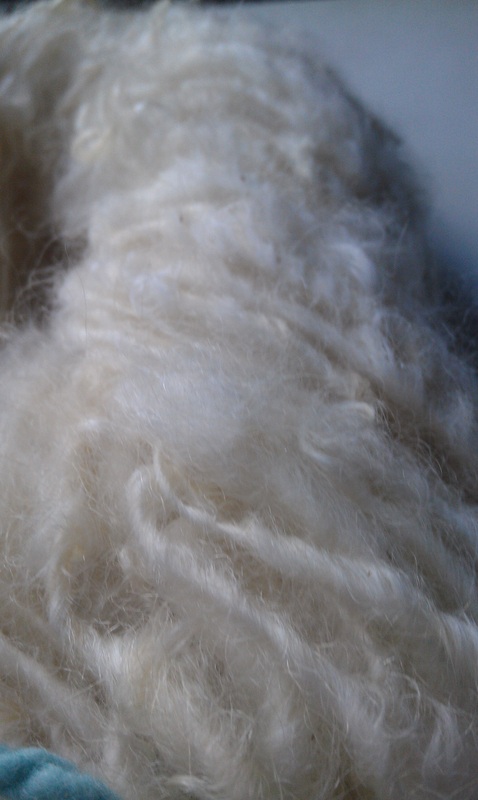
When my adventure started, I was faced with some understandably dirty, sticky locks. Here's the before washing photo of the mohair:
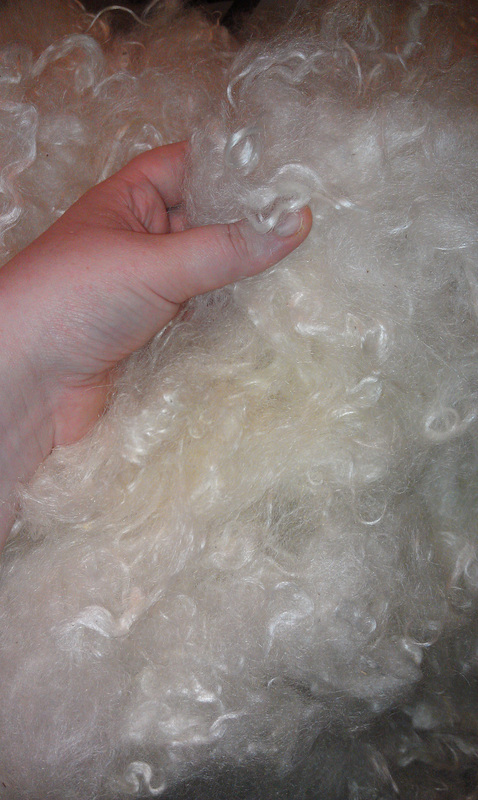
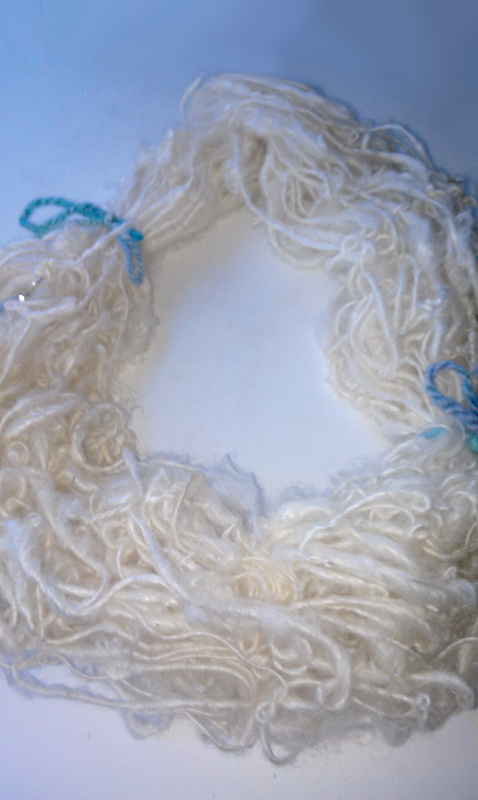
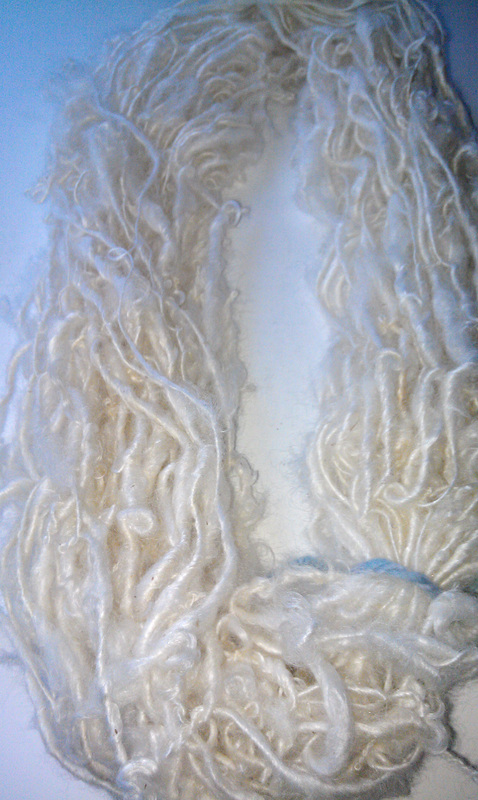
It took a few washes and rinses, but I was able to get the mohair clean of lanolin and ready to pick through. A little bit of chert (goat dandruff, for lack of better words) is common with mohair, so I had to pick through and remove the stray hay (VM), dirt, and chert so that all I had was beautiful locks. This process takes several hours for every pound of mohair that I process, since it's done all by hand to ensure that the locks stay as intact as possible (doll makers love to use mohair for doll hair since the curls are so lovely, and fellow spinners like myself love the texture of curly locks in our yarn). After picking through the fiber, I was left with this:
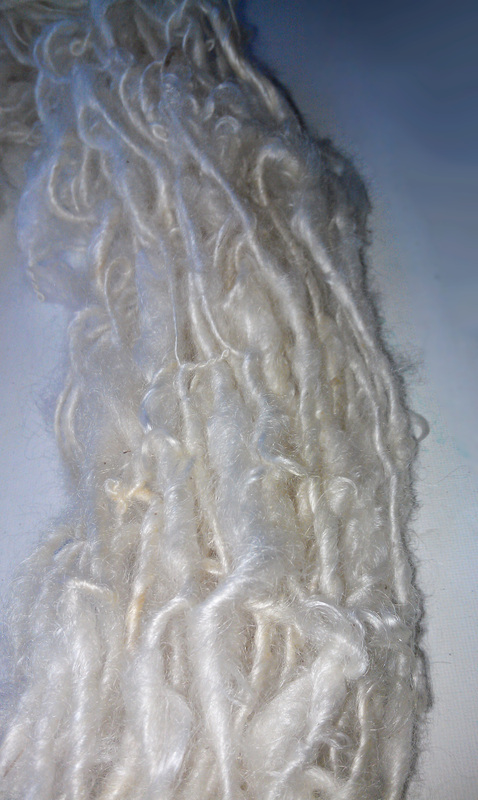
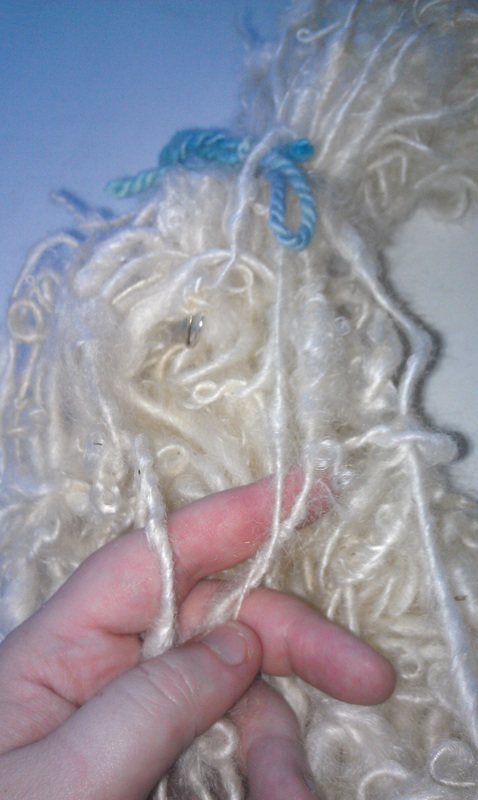
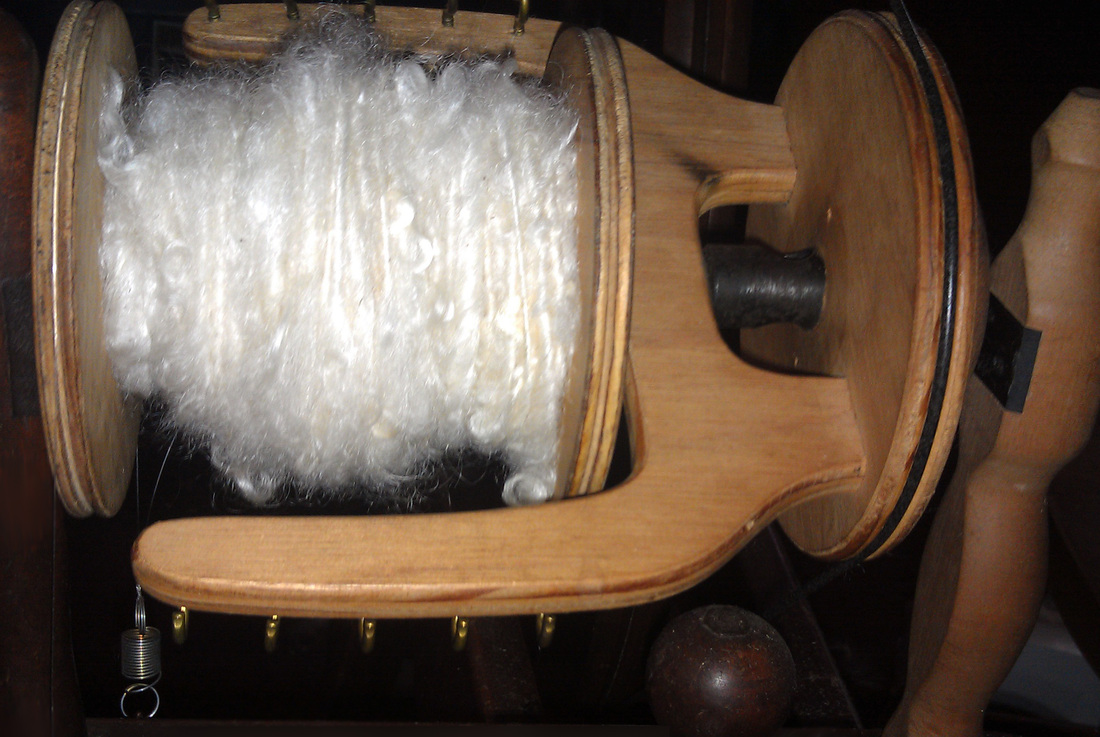
I love spinning fiber from the locks, and this was certainly a fun spinning session. I decided to take a small video to show how I did it. My goal with this yarn was to keep a little bit of the curly locks, but also have a fun, textured result.
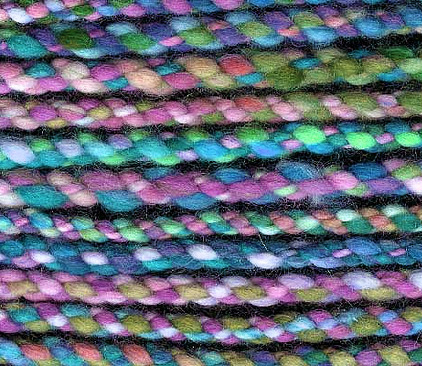
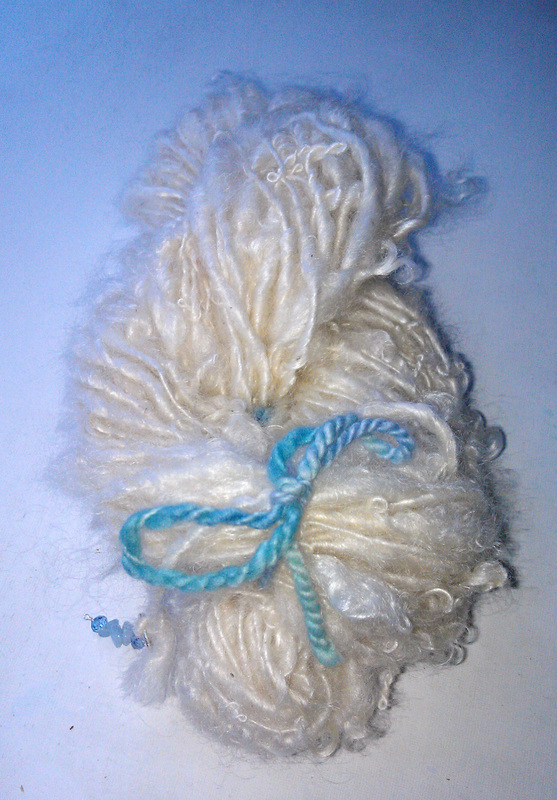
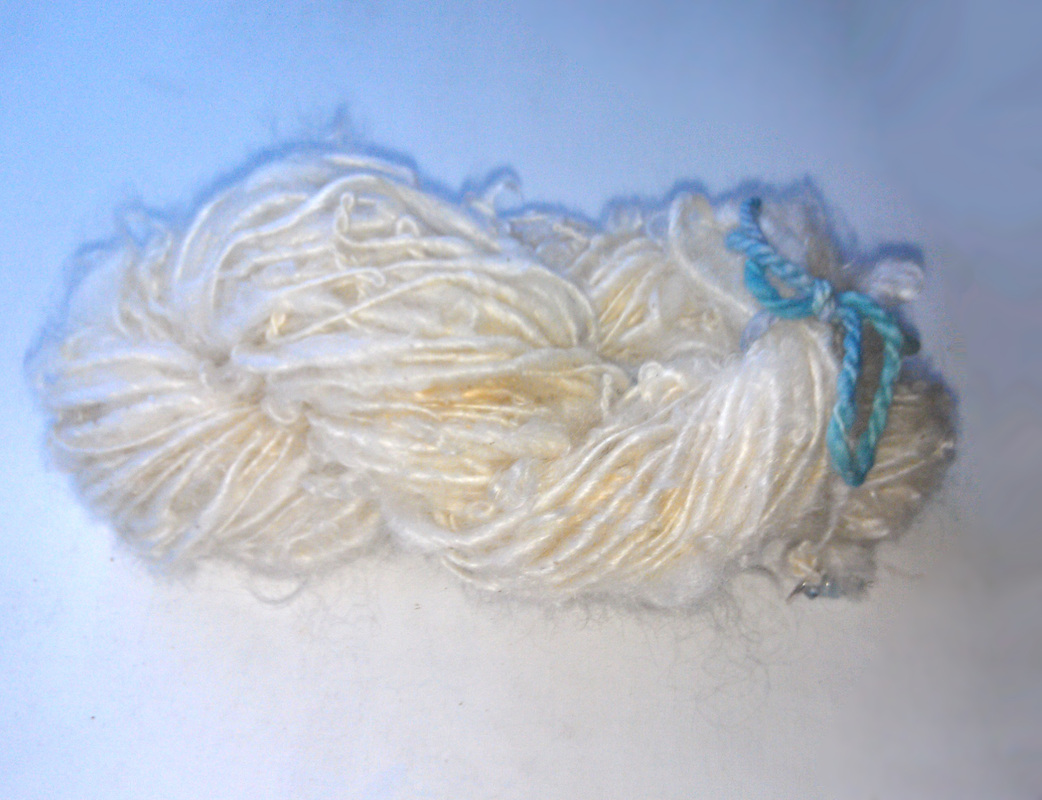
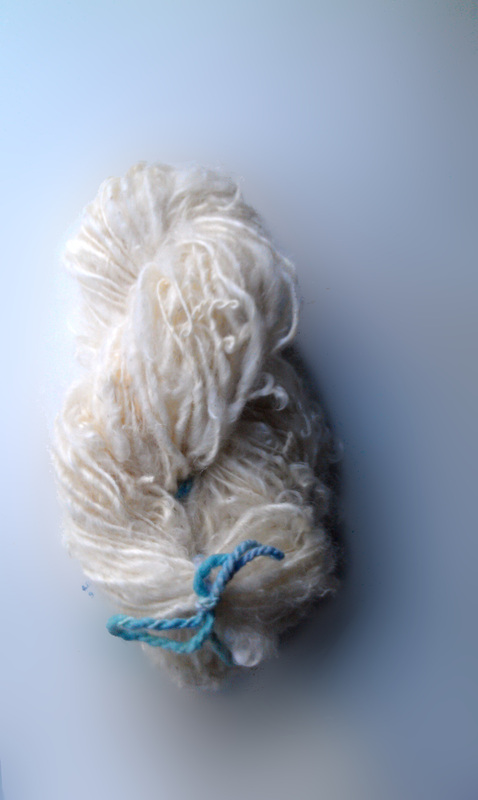
And the final yarn is finished! I offer this yarn for $25/skein or 5 for $100 (a $25 savings!). Each skein of yarn is custom spun for my customers, and no two will be exactly the same.
I have a secret about Firestar that I'd like to share with everyone. Traditional fiber, like wool and alpaca, requires a pretty elaborate dying method that many people find incredibly time consuming. I consider my own personal method to be much easier and less hassle, even more so when you consider how I dye firestar. Now before I get into that, let me give you a brief overview for how I dye everything else:
To keep this post simple, I am only going to talk about what I do with Greener Shades Acid Dye (Ive used other dyes but this is my preferred type of dye). The methods are the same regardless of what type of dye I use, with one exception -- the firestar trick seems to only work with Greener Shades for some reason.
To dye roving:
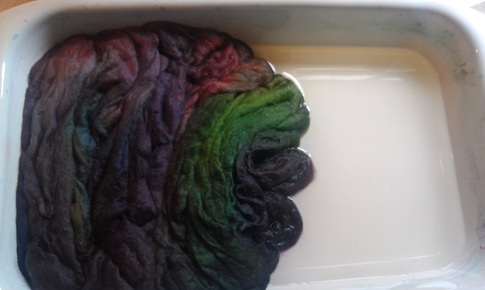
I saturate the fiber in hot water, then lay out a large white baking pan. This is about the closest thing to cooking that i EVER do. After the initial pre-soak (only really necessary for tough fibers like merino, which are slightly hydrophobic and require a lot of battling to get submerged), I add just a hint of citric acid to the pan full of hot water, then lay the roving out in whatever way I want.
I then ignore the instructions for the dye completely.
I take a spoon or butter knife and dip it in the jars of powdered dye, taking out just a little bit of dye at a time. I sprinkle the dye in whatever place I want it to be (or just mix it in if I'm being "free") and let the colors blend themselves in the pan. It's pretty easy to get a feel for how much dye is enough and how much dye is too much -- there's a saturation point where the color simply won't take anymore and you don't want to waste your dye. Usually that's not an issue for me since I rarely go with super dark colors.
That's it. I mix it up, pop it in the oven for about 30 minutes on 225 F, and when I take it out the water is clear --- that's how you know it worked. If your water is still colored, then you either didn't put enough citric acid in (vinegar also works) or you put too much dye in.
I love this way of dying fiber because not only is it incredibly easy, but it's also highly effective and allows me to really "paint" on the colors wherever I want. As a life-long artist, this is very similar to watercolor painting, so I find myself enjoying it a lot.
Here's some photos to show the simple dying process of roving:
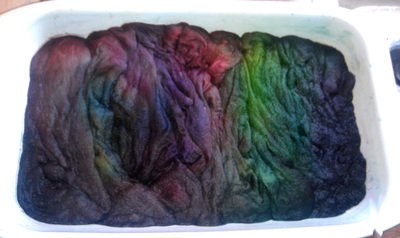
Pulling the roving back to make sure all of the color is out of the water.
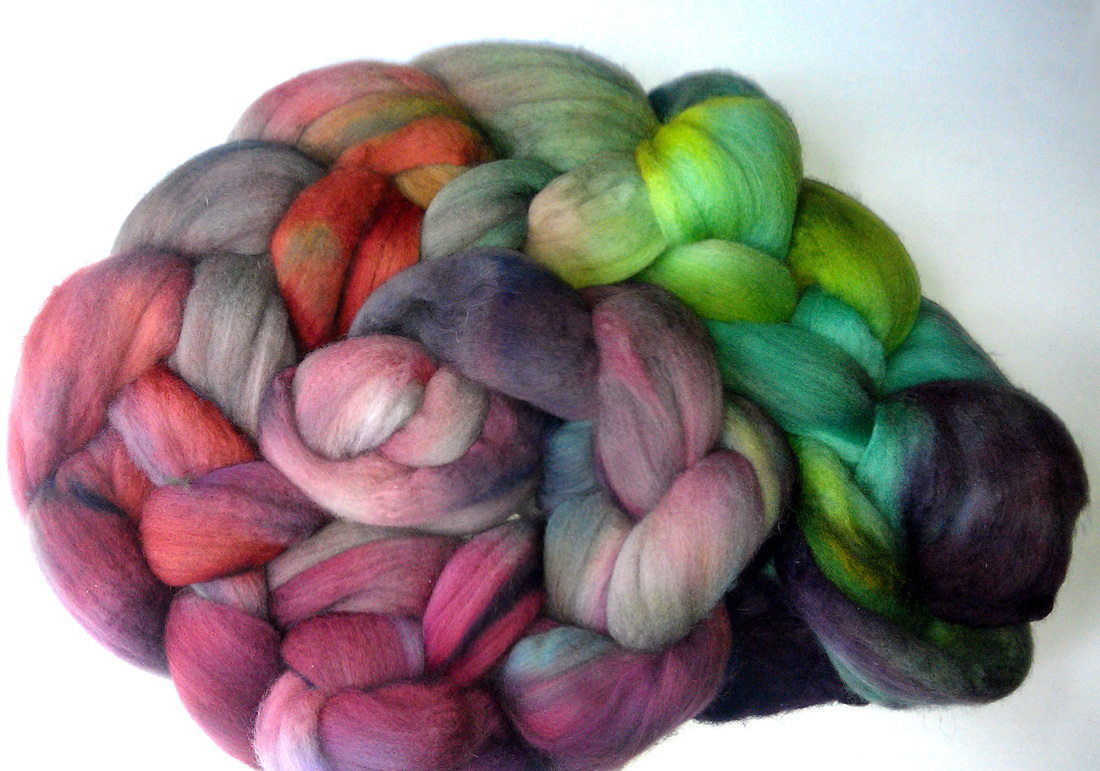
The finished roving, dried and ready to be purchased.
Something important about dying roving is that you need to lift up the roving to make sure the color has a chance to get under it and fully saturate it. Wool, alpaca, and most other animal fibers are naturally going to want to repel the water, so it sometimes takes a little convincing. I frequently use a potato masher or spoon to gently press the color into the fiber, and I've never had any felting issues. The trick is to be careful!
For firestar: the "Dip & Rinse" method by Holly Madison:
Here's where the fun trick comes in!
If you don't know what Firestar is:
Firestar is often used to add sparkle and just a touch of glitz to fiber batts, rolags, and felting. A little goes a long way, and it's amazing how beautiful a little sparkle can be (unlike angelina fiber which is 1) scratchy 2) can't be dyed and 3) is a bit TOO in your face for some people's taste), firestar is simple and lovely (I still like angelina, it just has to be the right kind of project).
Firestar has an awesome advantage over roving though! Instead of needing to go through the acid process, and either microwaving or baking it, you can do what I do and get wonderful results.
I start by keeping my firestar dry and making small bowls of the colors I want to use. You can still do the sprinkle method, but since the dye sets so fast, it's better to be prepared.
No acid is required to set the color in firestar as long as you're using Greener Shades Acid Dyes.
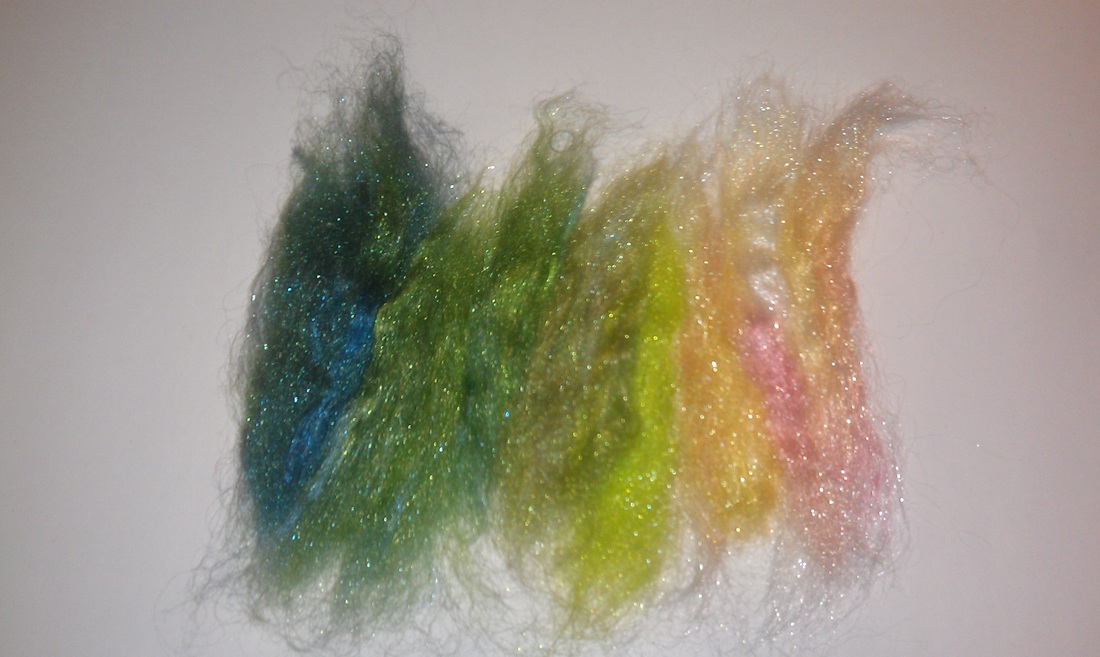
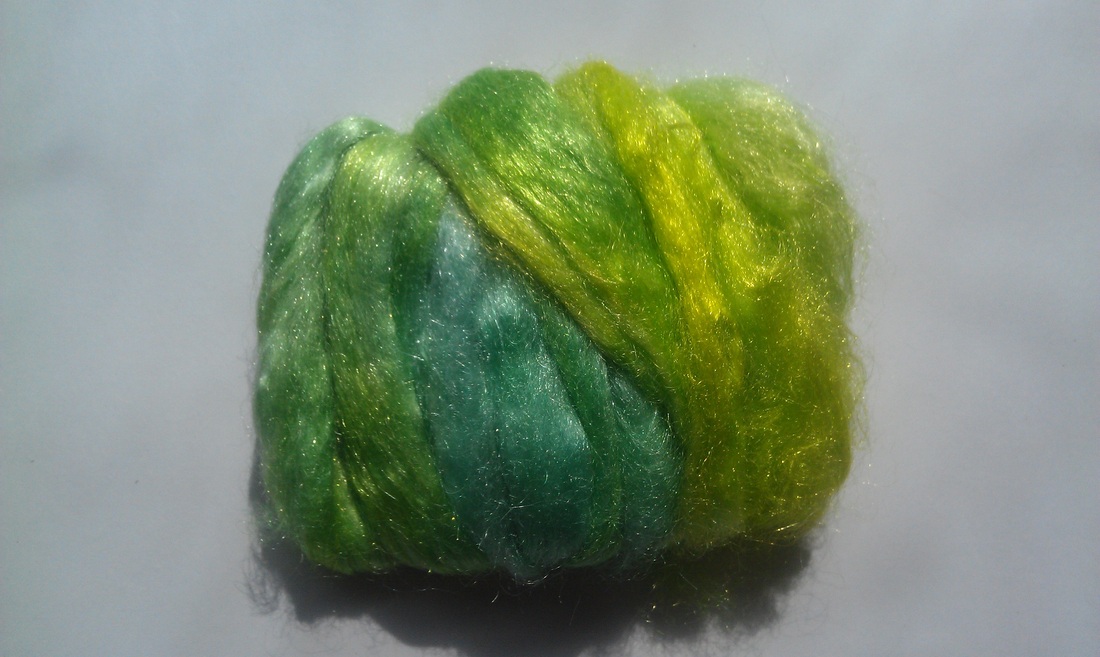
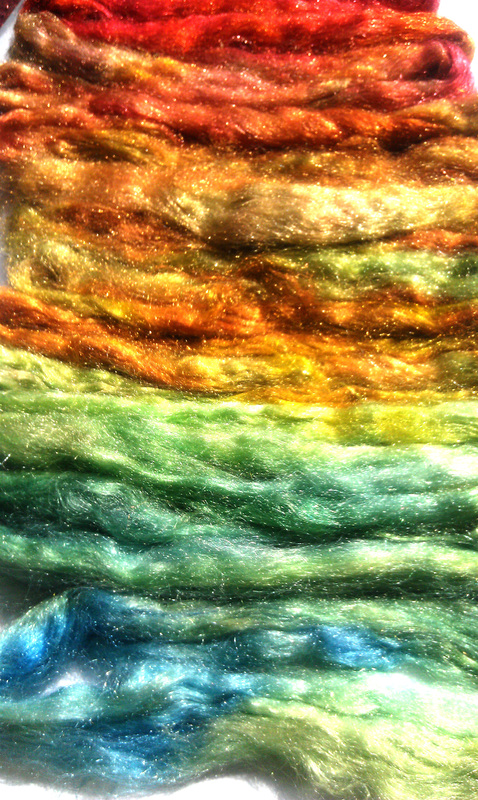
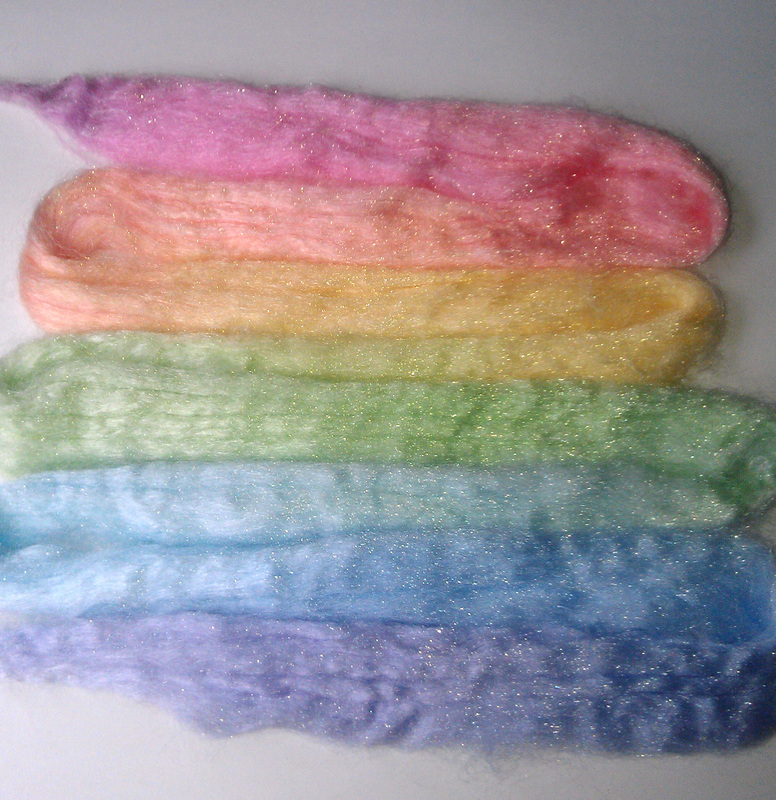
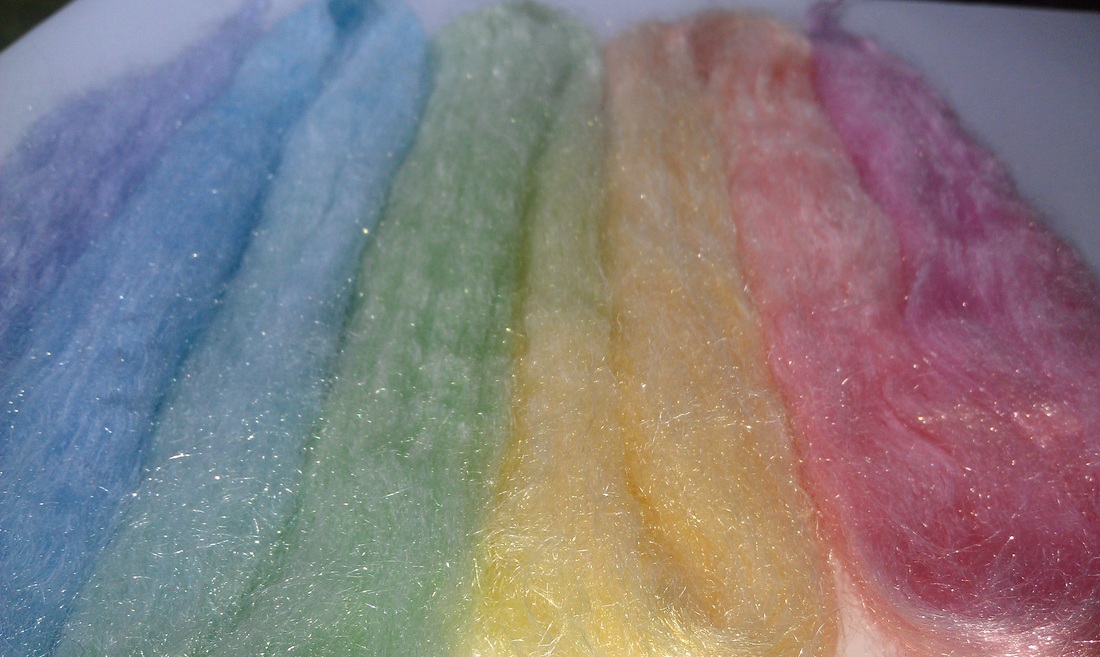
Just dip the fiber in the color that you want, and move on to the next color. If you don't want the colors to blend, you can rinse in between dips. You can also blend colors -- for example, I was making a batch of bright ranbow firestar for a custom order along with a pastel rainbow batch. For the pastel rainbow, I dipped the firestar in the red for just a second, then dipped part of the red and some undyed firestar into the yellow bowl, creating an orange color where they mixed. A few seconds in each color is all it takes for permanent, beautiful colors.
I discovered this trick in a happy accident when I dyed some firestar the wrong color several months ago, and tried to wash it out. It didn't work... in fact, nothing I did got the color out! I realized at that moment that this could be a fantastic advantage since it makes dying take literally seconds instead of a half an hour!
If you want darker colors, you can do several dips (making sure to rinse in between since firestar gets saturated very quickly and will only hold a certain amount of dye at a time). An easier route is to just cook the firestar with the oven method for dark, bright colors. But if you want medium or light colors, the dip and rinse is the easiest way to go!
Your water will run clear after a second or two, and that's when you know the dye has set in.
And that's it! Let me know if you have any questions.
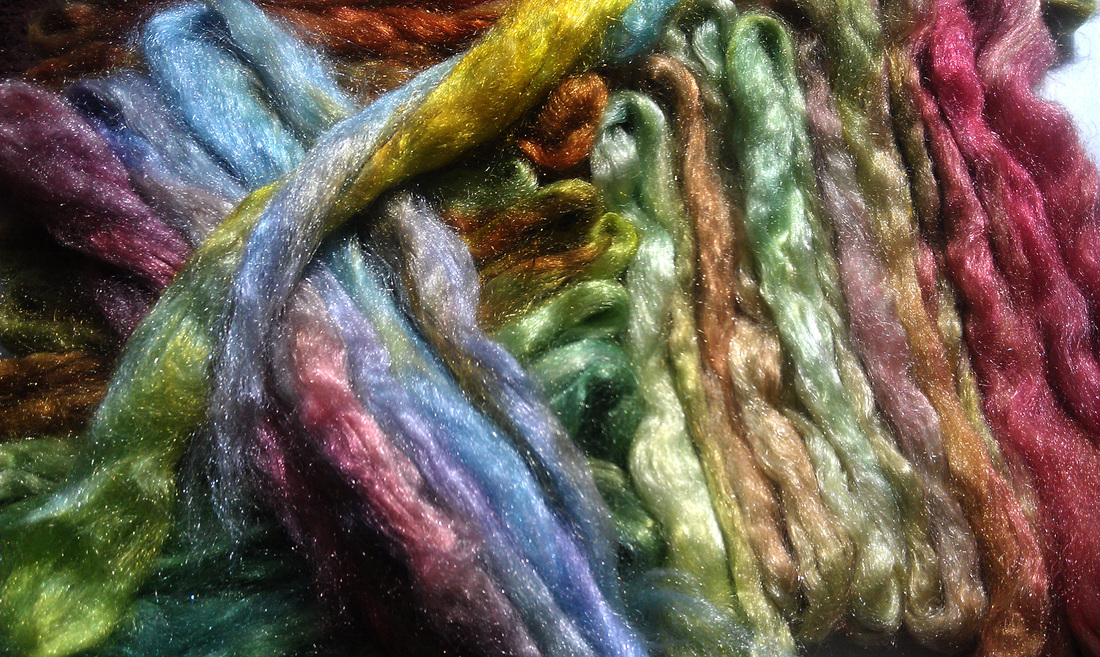
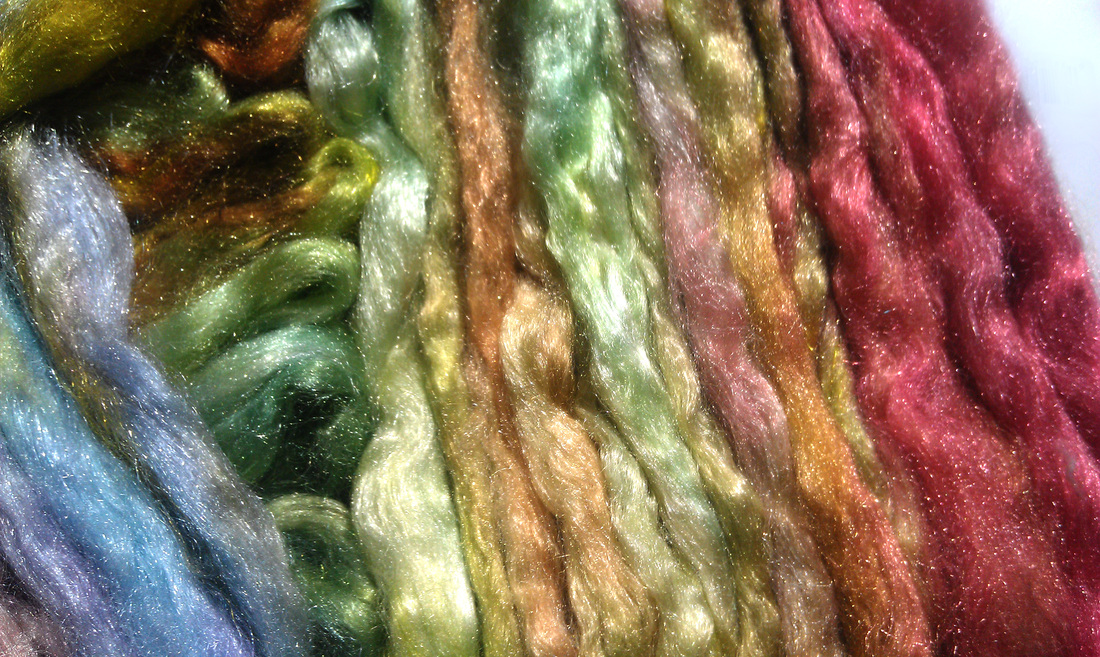
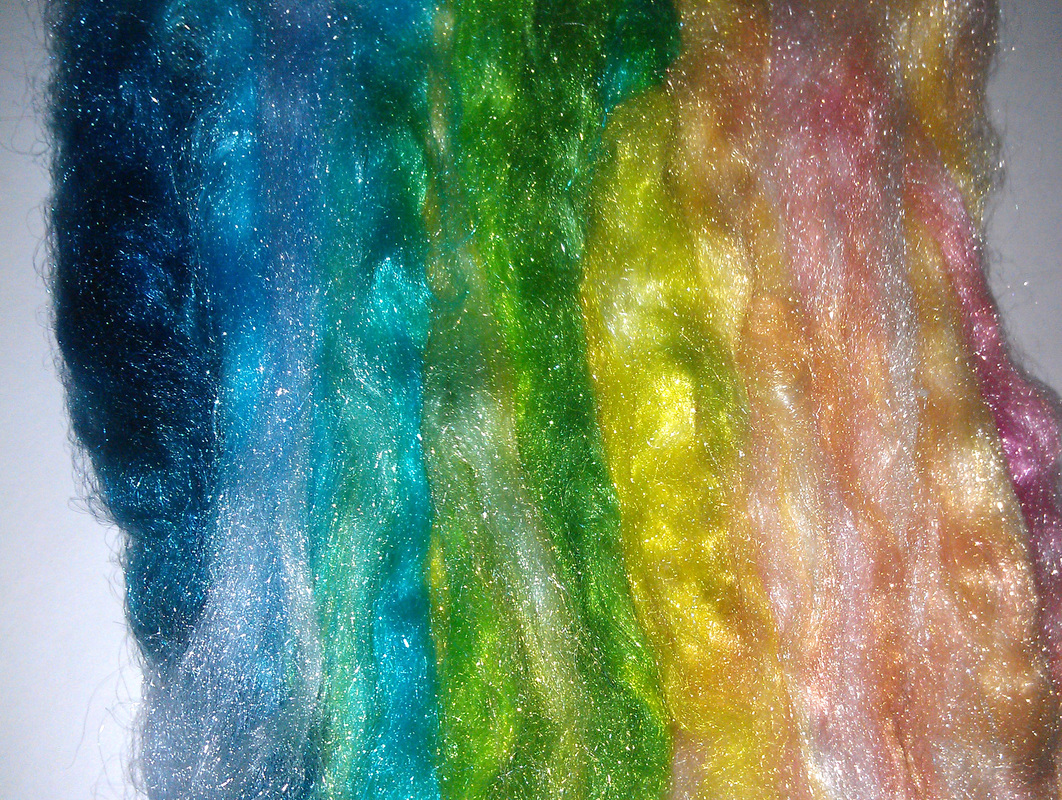
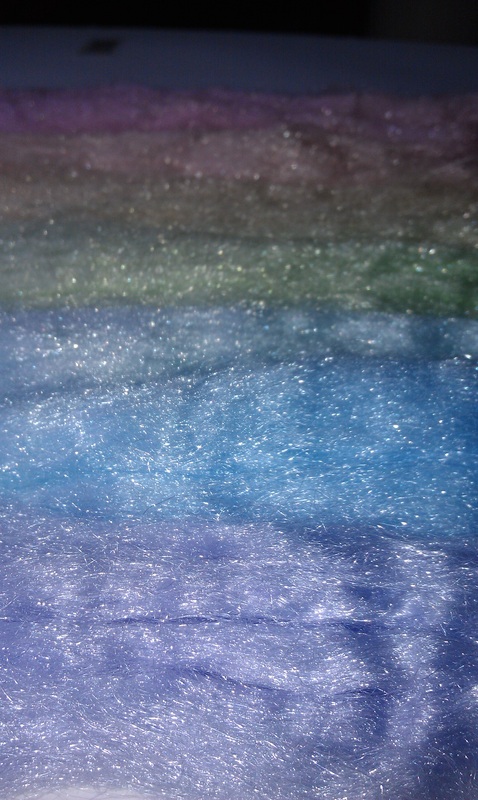
Here's some photos to show you the different colors I've gotten with Firestar using my method.
At this point we have processed a ton of sheep fleece from local farmers as well as our own alpaca stash, and I have to say that I adore both types of fiber for very different reasons. When I first started spinning fiber I mistakenly assumed that people would only ever want super fine fleece. But now I know that it all depends on the situation, and coarse fiber is sometimes exactly what the doctor ordered! For example,a friend on Ravelry recently was kind enough to give me a several pounds of Shetland from her own flock. After working with super fine alpaca primarily, it was a strange transition to go from soft, clean fiber to coarse, greasy wool. Yet within five minutes of starting to sort through the Shetland fleece, I quickly fell in love with it. The fibers were long and springy, and the grey color of the fleece was just beautiful. After only one washing, the fleece was absolutely stunning.Sure, it was rough compared to the alpaca and super fine merino I've grown accustomed to spinning, but this coarseness opened up so many doors in terms of what I could create on the spinning wheel, and created the perfect stage for making a beautiful woven rug or tapestry. Coarse fiber adds a ton of texture to yarn, so mixing some shetland with merino, mohair, and alpaca, created a fantastic, strong fiber that is fantastic for the typical art yarn I love to spin. Another benefit of having such a long staple fiber like Shetland is that you can spin it very loosely as a single without it getting too squirrely, so plying it isn't really needed the way it would be with alpaca. It's easy to draft, takes dye like a dream, and is just all around FUN to spin. I am currently trying to think up several different projects that I might be able to create out of my new stash of Shetland yarn. This is definitely a fiber I plan on keeping on hand whenever possible! Another interesting thing about Shetland is that not all of it is coarse like that... it's as diverse in texture as alpaca, and they come in 11 distinct colors and 30 different coat patterns! What I love the most about Briana's fiber is that I know it comes from sheep that have been treated like pets, in a cruelty free and loving environment. For skin-contact, Alpaca is still my very favorite type of fiber (tied only with Tibetan Yak) to both knit with and wear. The lack of scratchiness and unbelievable warmth make it a true luxury fiber (it's softer than most of the cashmere I have!). But shetland is a breath of fresh air, long and easy to spin, and .... well... just fun! It just goes to show you that sometimes trying new things can be a wonderful surprise, and I'm so grateful for the opportunity. Special thanks to Briana for her Shetland Wool - check out her Etsy store to purchase some of her goodies!
This has been a very busy couple of weeks! Dan (my husband) and I knew that we wanted to start a farm someday. I told him that using my love for art and animals and mixing it with the fiber industry would be an amazing way to create and make a living. I originally wanted to learn how to spin because I got into knitting and crocheting and noticed that all of the yarn I was finding at hobby stores was... well..... boring! A quick search online brought up some beautiful hand dyed yarn, but some people were asking for nearly $100 per skein... something I could definitely not afford on my budget. So I set out to find a way to create beautiful colors at an affordable price so I could use my own yarn and also try to share some of it with the rest of the world. One day I came across a lady who was moving back to Seattle and selling her alpaca farm, I jumped at the chance to buy over 200 pounds of alpaca fiber from her. Because dan and I are "starving students", this was a risky move and Dan wasn't at all convinced that it would pay off. But within the first two days of posting our raw fiber for sale, we had made back what we'd invested in it. We quickly realized that neither of us were comfortable sending dirty fleece in the mail, so we started washing and picking all of the fleece before we sent it (still selling it as "raw" because we didn't know any better). Now, only a month after we originally opened our fiber store, Blue Barn Fiber, we have been told by several customers that our fiber is the best processed, cleanest Alpaca that they have ever worked with! It's easy to understand why. If I won't spin it myself, I certainly won't sell it to a potential customer, and i absolutely HATE spinning fiber that's mucked up with VM. I get it as clean as possible and probably spend more time working on it than I ought to, but it's just important to me that people like their fiber enough to come back to us. Processing our own fiber by hand has taught me so much about what to look for in a good fleece. It has also taught me that we sold most of our alpaca for far less than it was worth -- good for our customers, oh well for us. The remaining alpaca fiber that we have is all just amazingly soft - between grade 1 and 2 - and I'm tempted to keep it all for myself! Of course, I'll probably end up just selling the yarn that I make out of it, so it will find its way back into the world in one way or another. As for Alpaca farming, one day we will have a farm of our own and raise our own alpacas, goats, sheep, and bunnies. Until then, we are really enjoying finding fiber from all over the world and doing the hard work so we can turn something raw into something beautiful. Buying our initial supply of alpaca opened up so many doors for us, and made me realize that this is something we really want to continue to do for a living going forward.
|
 RSS Feed