I have a secret about Firestar that I'd like to share with everyone. Traditional fiber, like wool and alpaca, requires a pretty elaborate dying method that many people find incredibly time consuming. I consider my own personal method to be much easier and less hassle, even more so when you consider how I dye firestar. Now before I get into that, let me give you a brief overview for how I dye everything else:
To keep this post simple, I am only going to talk about what I do with Greener Shades Acid Dye (Ive used other dyes but this is my preferred type of dye). The methods are the same regardless of what type of dye I use, with one exception -- the firestar trick seems to only work with Greener Shades for some reason.
To dye roving:
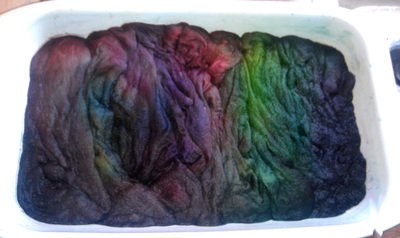
I saturate the fiber in hot water, then lay out a large white baking pan. This is about the closest thing to cooking that i EVER do. After the initial pre-soak (only really necessary for tough fibers like merino, which are slightly hydrophobic and require a lot of battling to get submerged), I add just a hint of citric acid to the pan full of hot water, then lay the roving out in whatever way I want.
I then ignore the instructions for the dye completely.
I take a spoon or butter knife and dip it in the jars of powdered dye, taking out just a little bit of dye at a time. I sprinkle the dye in whatever place I want it to be (or just mix it in if I'm being "free") and let the colors blend themselves in the pan. It's pretty easy to get a feel for how much dye is enough and how much dye is too much -- there's a saturation point where the color simply won't take anymore and you don't want to waste your dye. Usually that's not an issue for me since I rarely go with super dark colors.
That's it. I mix it up, pop it in the oven for about 30 minutes on 225 F, and when I take it out the water is clear --- that's how you know it worked. If your water is still colored, then you either didn't put enough citric acid in (vinegar also works) or you put too much dye in.
I love this way of dying fiber because not only is it incredibly easy, but it's also highly effective and allows me to really "paint" on the colors wherever I want. As a life-long artist, this is very similar to watercolor painting, so I find myself enjoying it a lot.
Here's some photos to show the simple dying process of roving:
To keep this post simple, I am only going to talk about what I do with Greener Shades Acid Dye (Ive used other dyes but this is my preferred type of dye). The methods are the same regardless of what type of dye I use, with one exception -- the firestar trick seems to only work with Greener Shades for some reason.
To dye roving:
I saturate the fiber in hot water, then lay out a large white baking pan. This is about the closest thing to cooking that i EVER do. After the initial pre-soak (only really necessary for tough fibers like merino, which are slightly hydrophobic and require a lot of battling to get submerged), I add just a hint of citric acid to the pan full of hot water, then lay the roving out in whatever way I want.
I then ignore the instructions for the dye completely.
I take a spoon or butter knife and dip it in the jars of powdered dye, taking out just a little bit of dye at a time. I sprinkle the dye in whatever place I want it to be (or just mix it in if I'm being "free") and let the colors blend themselves in the pan. It's pretty easy to get a feel for how much dye is enough and how much dye is too much -- there's a saturation point where the color simply won't take anymore and you don't want to waste your dye. Usually that's not an issue for me since I rarely go with super dark colors.
That's it. I mix it up, pop it in the oven for about 30 minutes on 225 F, and when I take it out the water is clear --- that's how you know it worked. If your water is still colored, then you either didn't put enough citric acid in (vinegar also works) or you put too much dye in.
I love this way of dying fiber because not only is it incredibly easy, but it's also highly effective and allows me to really "paint" on the colors wherever I want. As a life-long artist, this is very similar to watercolor painting, so I find myself enjoying it a lot.
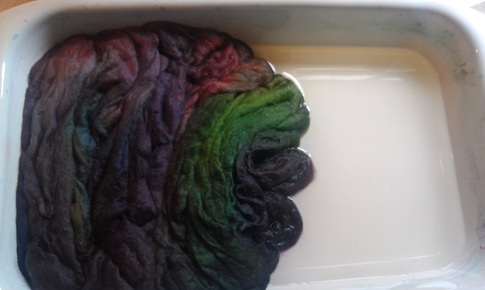
Here's some photos to show the simple dying process of roving:
Pulling the roving back to make sure all of the color is out of the water.
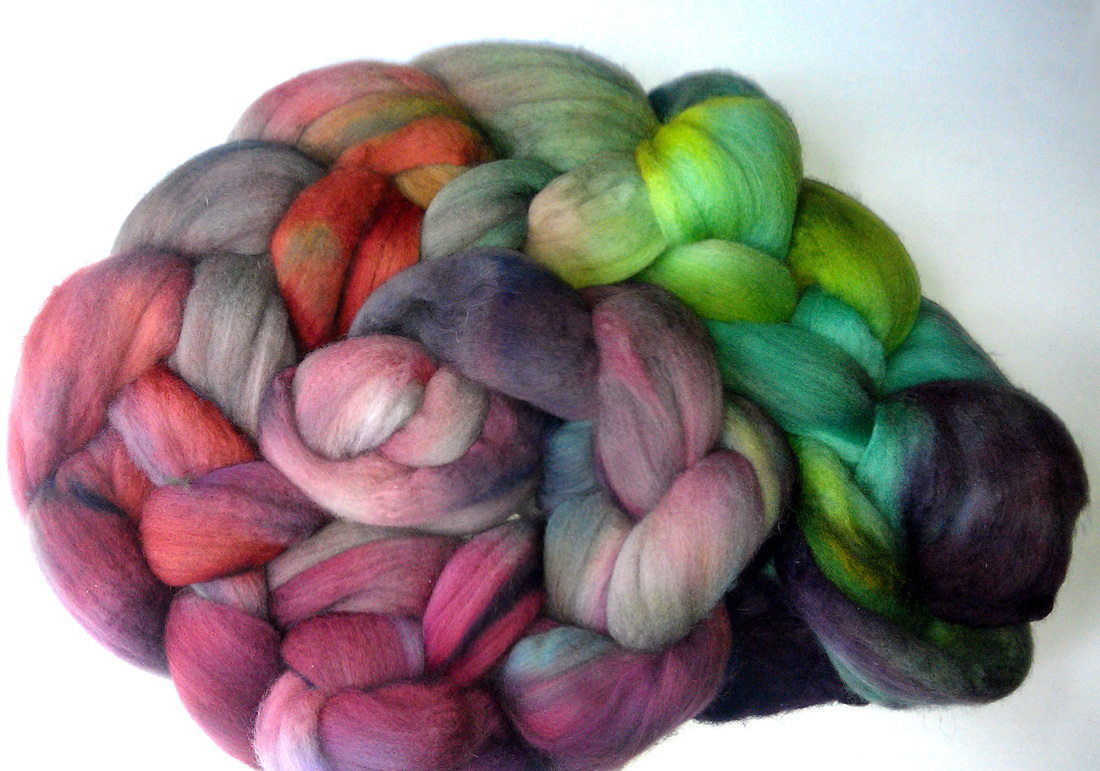
The finished roving, dried and ready to be purchased.
Something important about dying roving is that you need to lift up the roving to make sure the color has a chance to get under it and fully saturate it. Wool, alpaca, and most other animal fibers are naturally going to want to repel the water, so it sometimes takes a little convincing. I frequently use a potato masher or spoon to gently press the color into the fiber, and I've never had any felting issues. The trick is to be careful!
For firestar: the "Dip & Rinse" method by Holly Madison:
Here's where the fun trick comes in!
If you don't know what Firestar is:
Firestar is often used to add sparkle and just a touch of glitz to fiber batts, rolags, and felting. A little goes a long way, and it's amazing how beautiful a little sparkle can be (unlike angelina fiber which is 1) scratchy 2) can't be dyed and 3) is a bit TOO in your face for some people's taste), firestar is simple and lovely (I still like angelina, it just has to be the right kind of project).
Firestar has an awesome advantage over roving though! Instead of needing to go through the acid process, and either microwaving or baking it, you can do what I do and get wonderful results.
I start by keeping my firestar dry and making small bowls of the colors I want to use. You can still do the sprinkle method, but since the dye sets so fast, it's better to be prepared.
No acid is required to set the color in firestar as long as you're using Greener Shades Acid Dyes.
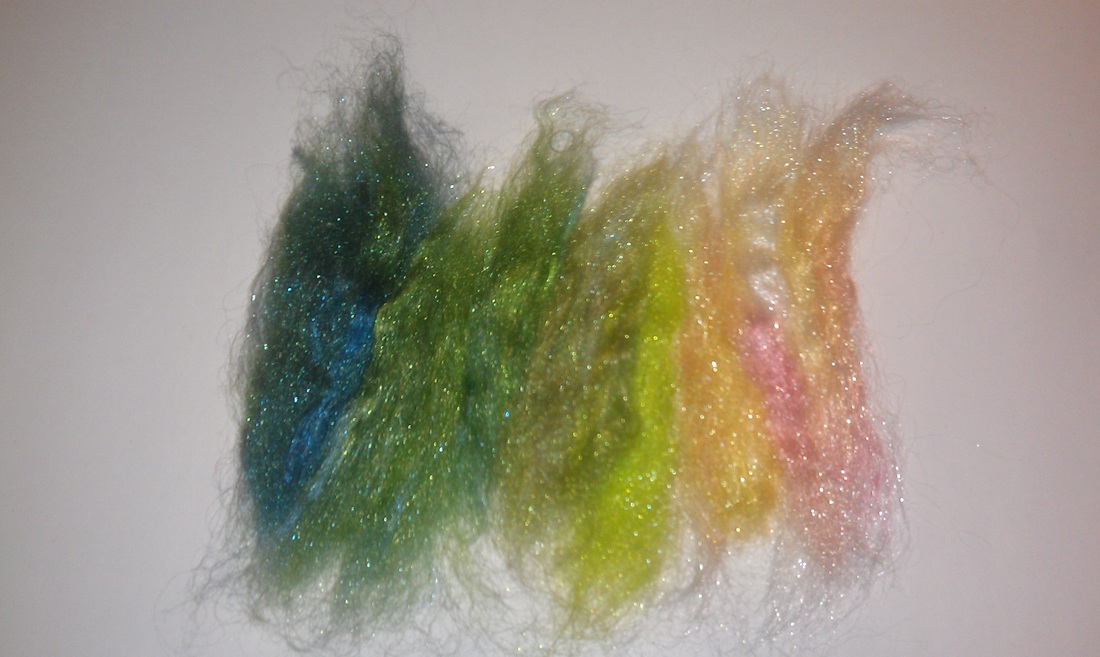
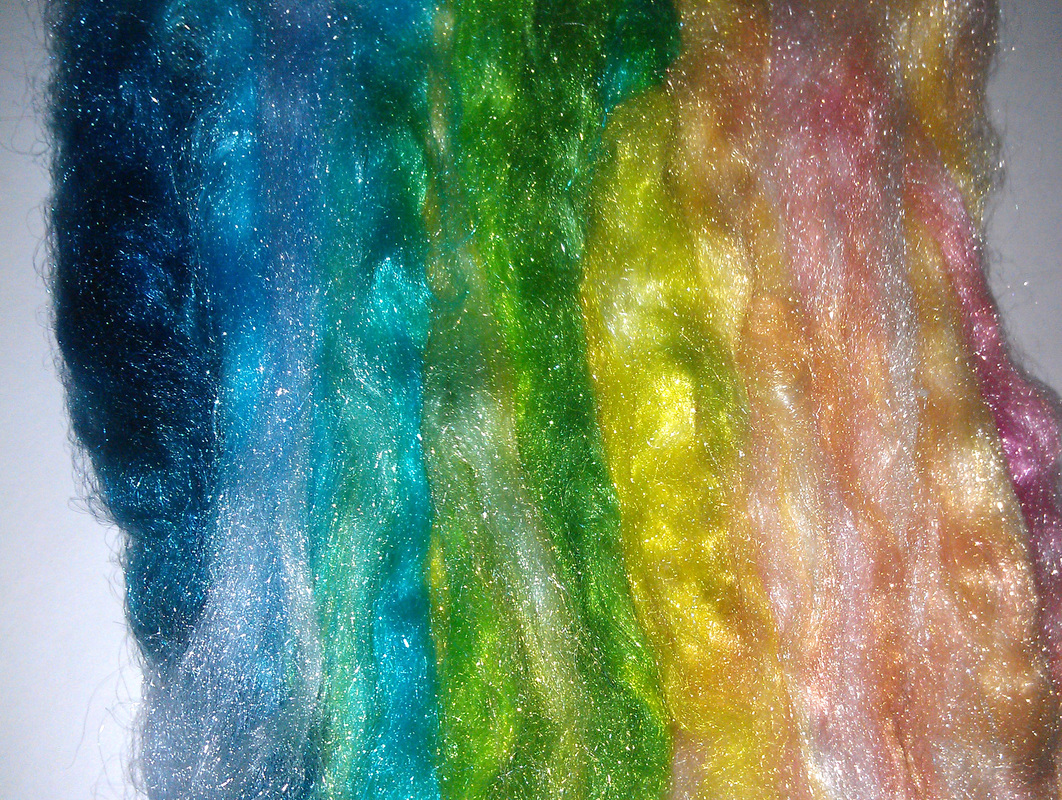
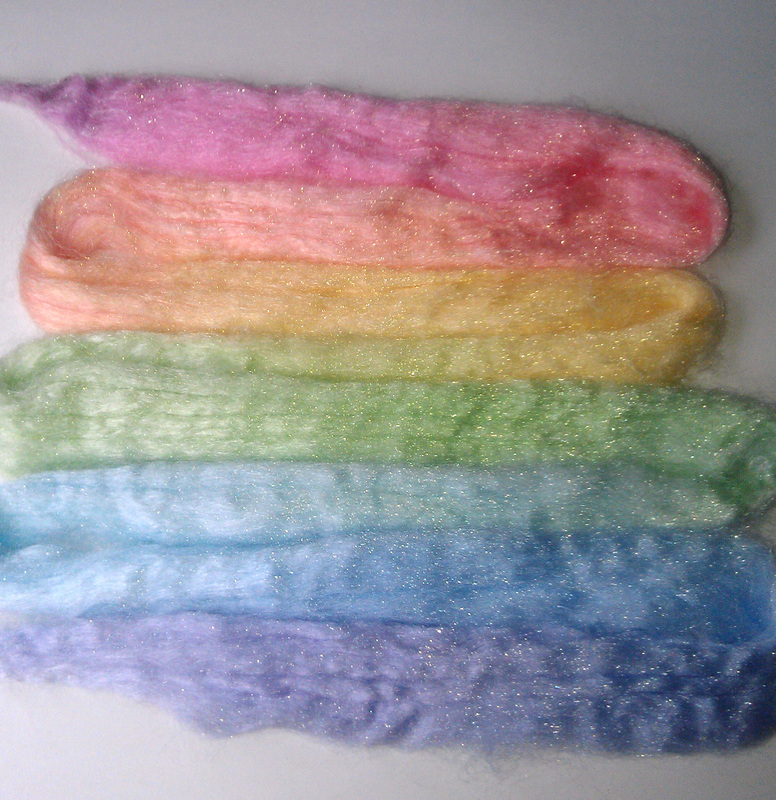
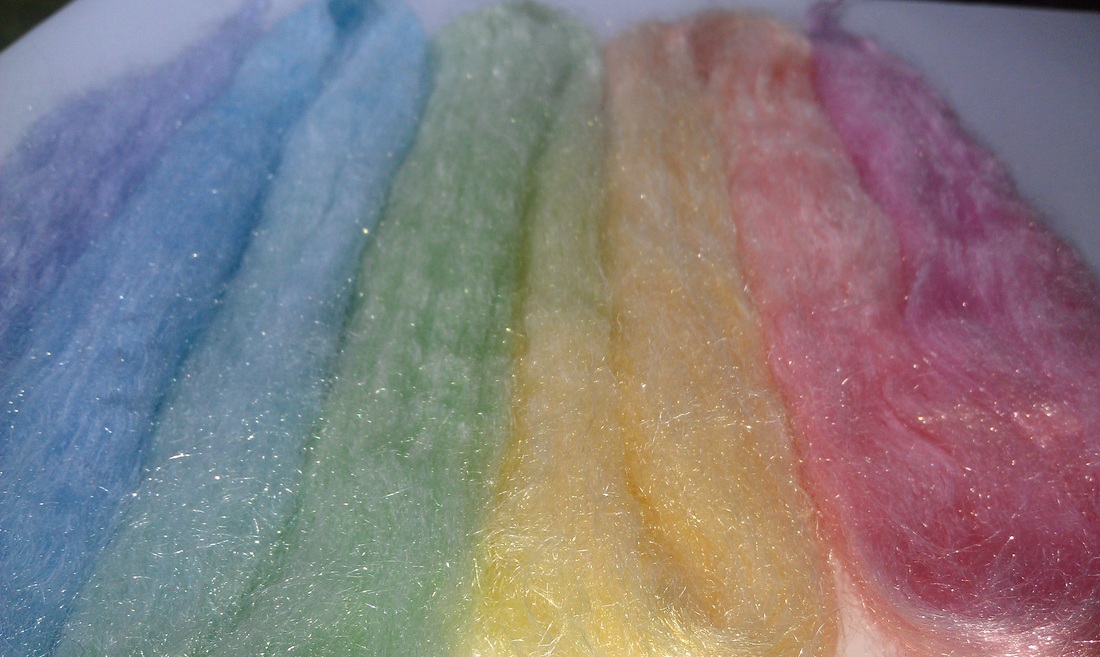
Just dip the fiber in the color that you want, and move on to the next color. If you don't want the colors to blend, you can rinse in between dips. You can also blend colors -- for example, I was making a batch of bright ranbow firestar for a custom order along with a pastel rainbow batch. For the pastel rainbow, I dipped the firestar in the red for just a second, then dipped part of the red and some undyed firestar into the yellow bowl, creating an orange color where they mixed. A few seconds in each color is all it takes for permanent, beautiful colors.
I discovered this trick in a happy accident when I dyed some firestar the wrong color several months ago, and tried to wash it out. It didn't work... in fact, nothing I did got the color out! I realized at that moment that this could be a fantastic advantage since it makes dying take literally seconds instead of a half an hour!
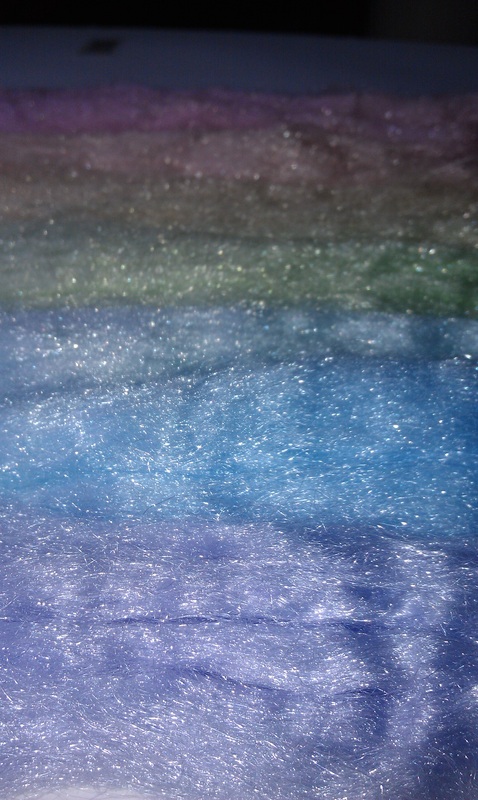
If you want darker colors, you can do several dips (making sure to rinse in between since firestar gets saturated very quickly and will only hold a certain amount of dye at a time). An easier route is to just cook the firestar with the oven method for dark, bright colors. But if you want medium or light colors, the dip and rinse is the easiest way to go!
Your water will run clear after a second or two, and that's when you know the dye has set in.
And that's it! Let me know if you have any questions.
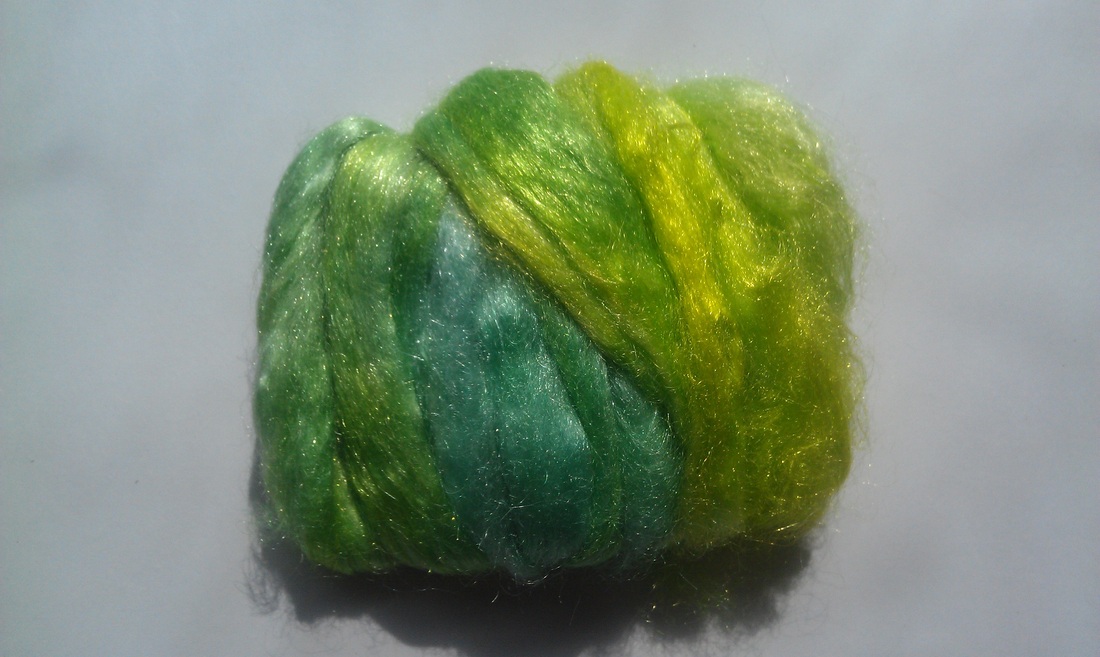
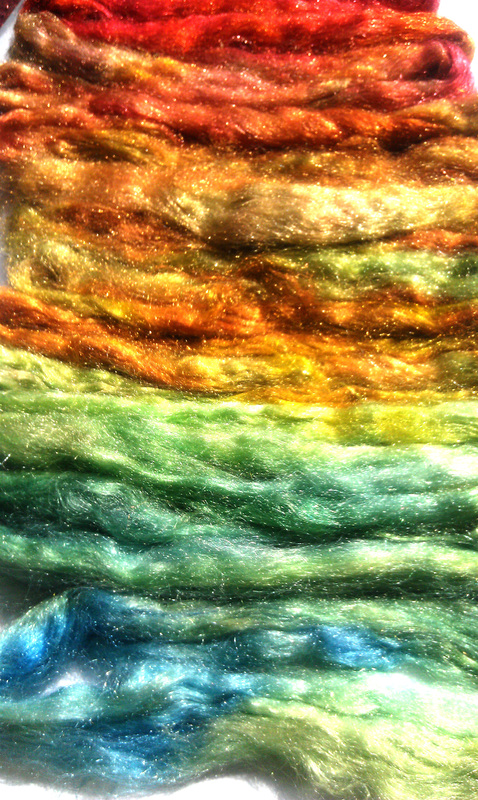
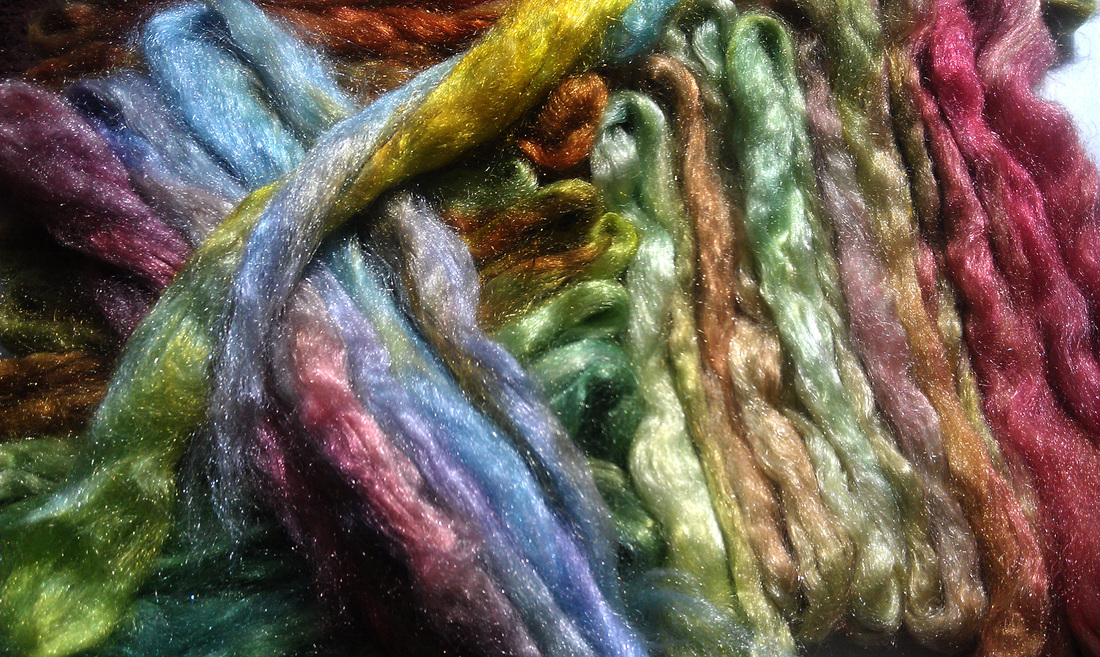
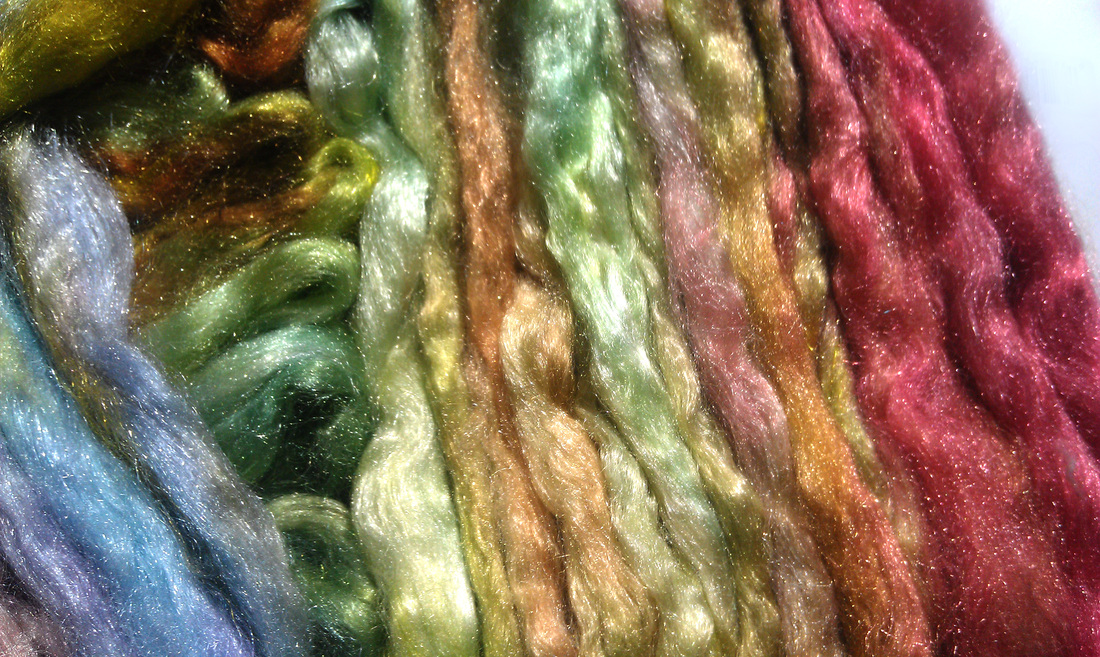
Here's some photos to show you the different colors I've gotten with Firestar using my method.
For firestar: the "Dip & Rinse" method by Holly Madison:
Here's where the fun trick comes in!
If you don't know what Firestar is:
Firestar is often used to add sparkle and just a touch of glitz to fiber batts, rolags, and felting. A little goes a long way, and it's amazing how beautiful a little sparkle can be (unlike angelina fiber which is 1) scratchy 2) can't be dyed and 3) is a bit TOO in your face for some people's taste), firestar is simple and lovely (I still like angelina, it just has to be the right kind of project).
Firestar has an awesome advantage over roving though! Instead of needing to go through the acid process, and either microwaving or baking it, you can do what I do and get wonderful results.
I start by keeping my firestar dry and making small bowls of the colors I want to use. You can still do the sprinkle method, but since the dye sets so fast, it's better to be prepared.
No acid is required to set the color in firestar as long as you're using Greener Shades Acid Dyes.
Just dip the fiber in the color that you want, and move on to the next color. If you don't want the colors to blend, you can rinse in between dips. You can also blend colors -- for example, I was making a batch of bright ranbow firestar for a custom order along with a pastel rainbow batch. For the pastel rainbow, I dipped the firestar in the red for just a second, then dipped part of the red and some undyed firestar into the yellow bowl, creating an orange color where they mixed. A few seconds in each color is all it takes for permanent, beautiful colors.
I discovered this trick in a happy accident when I dyed some firestar the wrong color several months ago, and tried to wash it out. It didn't work... in fact, nothing I did got the color out! I realized at that moment that this could be a fantastic advantage since it makes dying take literally seconds instead of a half an hour!
If you want darker colors, you can do several dips (making sure to rinse in between since firestar gets saturated very quickly and will only hold a certain amount of dye at a time). An easier route is to just cook the firestar with the oven method for dark, bright colors. But if you want medium or light colors, the dip and rinse is the easiest way to go!
Your water will run clear after a second or two, and that's when you know the dye has set in.
And that's it! Let me know if you have any questions.
Here's some photos to show you the different colors I've gotten with Firestar using my method.
 RSS Feed